Summary
FileZilla Client is a fast and reliable cross-platform FTP, FTPS and SFTP client with lots of useful features and an intuitive graphical user interface. This article provides instructions for you to install and setup the FileZilla Client on a Macintosh Device.
Body
Overview
FileZilla Client is a fast and reliable cross-platform FTP, FTPS and SFTP client with lots of useful features and an intuitive graphical user interface. This article provides instructions for you to install and setup the FileZilla Client on a Macintosh Device.
Installing FileZilla Client
These steps will help you walk through the installation process for the FileZilla Client:
- Download the macOS (Apple Silicon) installer at https://filezilla-project.org/download.php?show_all=1
- Go to the Downloads folder and double click on the file FileZilla_3.*_macos-arm64.app.tar.bz2 (This will extract the FileZilla app into the Downloads folder.)
- Move (drag) the app to the Applications folder
- In the Applications folder, double-click on FileZilla to open it
Back to Top
Setup with Quickconnect
- Open the application
- In the top toolbar, type in the following information:
- Host = <the hostname you're connecting to>
- Username = <your username for the host>
- Password = <your password for the host>
- Port = <the port for the host you're connecting to>
- Click Quickconnect

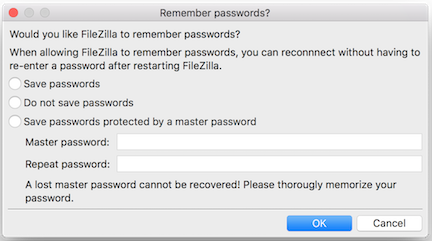
- Choose if you would like your password saved
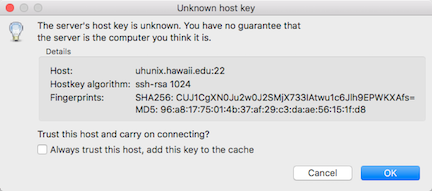
- Click OK for the Unknown host key prompt to continue.
- Once you are connected, you should see a window similar to below.
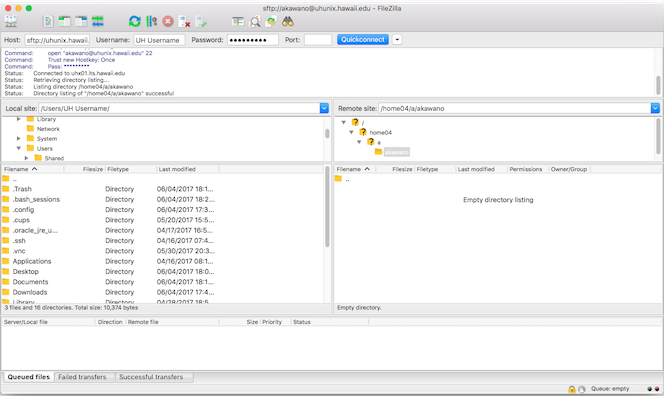
The left pane of the window represents the directory structure for your Macintosh. The right pane represents the directory structure of the remote host. To download a file, select the file in the right pane and drag them to the left pane. To upload a file, select the file from the left pane and drag them to the right pane. You may copy files to folders by dragging the files onto the folder. To select files not adjacent to each other, hold down the Command key and click on the name of the files.
Back to Top
Setup with Site Manager
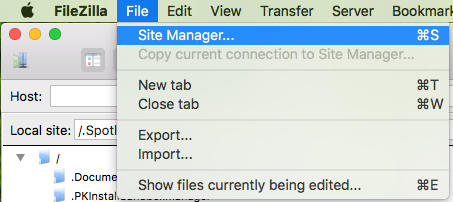
- The Site Manager allows FileZilla client users to store information about their sFTP sites. You can access the Site Manager under the File menu, or you can press Ctrl+S or Command+S.
- Click the New Site button.
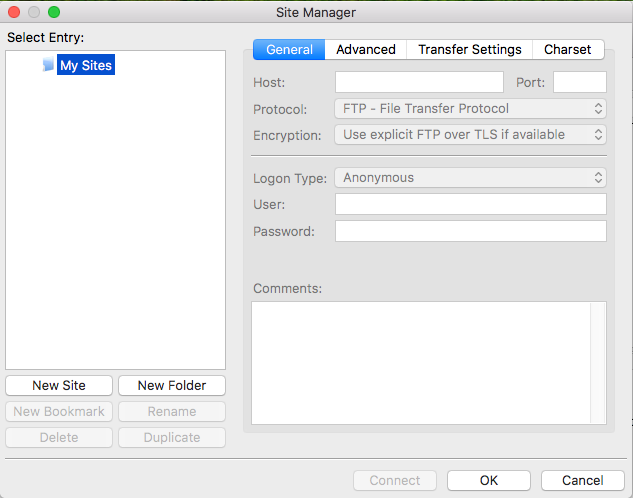
- Name your site to differentiate if adding more than one host.
- Host = <the hostname you're connecting to>
- Username = <your username for the host>
- Password = <your password for the host>
- Port = <the port for the host you're connecting to>
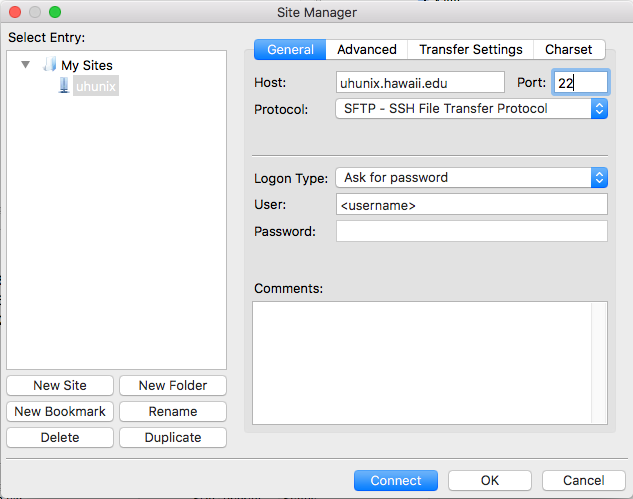
- If you would like FileZilla to remember your password until the application is closed, select the option. Enter your password and click ok.

Back to Top